
Disclaimers: Our site uses demographic data, email opt-ins, display advertising, and affiliate links. Please check out our Terms and Conditions for more information.
Beekeeping is one of my favorite hobbies at home. It is a relaxing activity, great for maintaining pollinators (although some argue this), and nothing beats locally cultivated honey!
Unlike other gardening and farming activities (bees are livestock, after all), you typically do not need a massive plot of land to reap the reward of starting a beehive or three.
Yes, local zoning laws in cities may change this, but since bees fly several miles a day in search of nectar and return it to their compact space of a hive, getting into beekeeping can be incredibly easy.
So if you are looking into setting up an apiary, we thought we would share a breakdown of all of the beekeeping equipment you need to purchase, as well as others you may want to purchase.
🐝 Beekeeping Equipment – What Do You Really Need?
- In the Apiary: Beekeeping you need to get started with an apiary are bee hives, bees (of course), a bee suit, a smoker, a hive tool, and brush
- For Upkeep: When managing your apiary, you may need sugar feeders, sugar, pollen patties, mite treatments, and additional frames/hive boxes to replace damaged parts
- Harvesting Honey: When harvesting honey, you may need wax capping tools, an extractor, and jars to name a few- these expenses add up!
Need to pick up some new beekeeping equipment? Click to shop today.
Bee Hives

The first thing you need to get into beekeeping is a beehive.
There are many different styles and sizes of beehives available on the market, from the common Langstroth hive to Flow hives, top bar hives, and many more.
While every beekeeper's interest differs, we found Langstroth hives easy to use, incredibly customizable to your needs, and more or less recognized as the gold standard in beekeeping.
The standard setup for a beehive includes three boxes per hive. These can vary in height (shallow, medium, and deep) and width in terms of the number of frames (eight and ten frames are the most popular).
The breakdown of a Langstroth hive is generally one box for brood, one box for honey for the bees, and one or more boxes for honey for us to extract (called a super).
You'll find an untold number of recommendations out there, but one of the most popular configurations is two deeps for the bee brood and honey chambers and one medium for the “super” box that we extract our honey from.
Unless you are in a warm climate where bees can forage year-round, this configuration allows ample room for bees to rear brood and collect honey in the lower two chambers (generally mixed between the two) and enough space to fill out honey for us at peak flows in the slightly shallower, medium super. Some beekeepers also have several mediums for heavy flow areas; however, we typically harvest a single super box when full and simply replace it.
After deciding on your depth configuration, you need to figure out the width as well. Many hobby beekeepers generally enjoy 8 frame hives as they are typically 20% lighter than their 10 frame counterparts. A fully drawn-out 8-frame deep can weigh 64 pounds, whereas a 10-frame deep can weigh over 80 lbs! This certainly makes a hefty difference when picking up full boxes.
Ultimately, for our hives we operate in the following setup:
- Two 8 Frame Deep Brood Chambers
- One 8 Frame Medium Super
When ordering bee hives, it is also worth noting that hives can come fully assembled or unassembled as a stack of wood. Unless you have a lot of time, a nail gun, and other required equipment, it is a significant timesaver to buy a pre-assembled hive. A few extra dollars saved a lot of our sanity there!
From there, you should consider buying ancillary accessories like a queen excluder to separate the brood and super chambers (no eggs in your honey box!), entrance reducers, mouse guards, and covers.
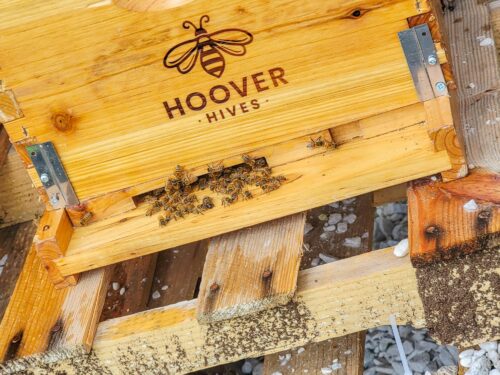
Many beehive suppliers, like Galena Farms, sell all of these items in a kit which we highly recommend for those starting out. Use code HIPSTERHOMESTEADERS to take 5% off your order, too! We also use Hoover Hives brand Langstroth hives, and you can read our Hoover Hives review here.
Note: It is always recommended to start with at least two hives when setting up an apiary. This lets you compare and contrast hive health and share resources to buoy a struggling hive. Maintaining an apiary of just one hive is incredibly risky. We started with two and expanded into four and the flexibility has been incredibly helpful!
Bees

Once you have your hives, you need to acquire bees!
Although it is possible to trap a swarm locally, for new beekeepers, it is simply far easier to buy bees from a local apiary or, if you are not close to one, order a package of bees online and have them delivered- yes, bees can be shipped in the mail, but there are, naturally, risks attached!
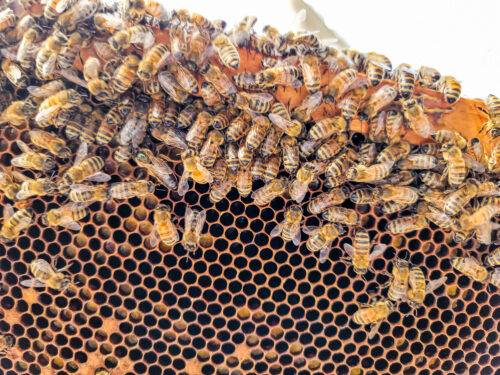
We personally like to buy package bees in the form of a nucleus colony from local apiaries. These often include five frames of bees, with a mated queen, drawn comb, capped brood and eggs, and a frame or two of honey reserves.
This is preferable to a package of bees as those come in a box and gets dumped into a hive without additional resources critical to a young hive's survival (honey, brood, etc.). As it takes time for bees to draw out new frames and more time for newly laid eggs to emerge as bees, package bees for new hives adds several layers of risk despite being a cheaper cost.
Note: If you are driving out to pick up a nucleus colony, you may want to take a mesh laundry bag to place the nuc box in before placing them in your trunk. Otherwise you may have some errant bees coming out of your trunk when you open it at home!
A Bee Suit

While you may see beekeeping videos of apiary workers maintaining hives without a suit, we can never recommend this.
Stings are not fun, allergies can still develop later in life after many stings, and a lot of the risks can be minimized by wearing a bee suit.
You will still get stung. You will still feel the pain. You may still become allergic. But I will take an occasional sting on accident over the inevitable, many stings I would receive without a suit.
I would argue that being stung through a suit is better than being stung without one. In one case, I was leaning over, my suit became tight on my back, and I felt the pinch of a sting. I stood up, my suit went slack, and the stinger pulled out of my skin with the suit- all within a fraction of a second. Compared to stingers that got lodged directly in my skin, with more time to inject venom, the pain and residual redness were a whole lot less when it happened through my suit. (I have also lost count of the times I've seen a bee trying to sting my hand, but the gloves protected me from noticing anything at all.)
A good suit to me has a few key elements:
- Tight connection points on the skin around the wrists and ankles
- A rigid frame veil
- Breathable material
- Quality leather gloves
I purchased a Humble Bee suit and enjoyed the breathability and elastic material around the wrists and ankles. However, I found the veil less rigid than I would like (a drop on the back of the neck resulted in an unpleasant sting!). A full Humble Bee suit review can be found here. A backward baseball cap helped improve this. Likewise, the kit gloves cracked quickly, and I purchased higher-quality beekeeping gloves to replace them.
Don't get into beekeeping without a suit under any circumstance!
Bee Equipment Set
There are an untold number of beekeeping accessories that you may be pressured to buy via reviews like this one. There are hive tools, frame holders, smokers, queen cages, tools for harvest, and so so many more.
Ultimately, the basic items you 100% need to get into beekeeping are the following:
- A smoker and a lighter
- A hive tool
- A brush
- Wax decapping knife/scraper (at harvest, at least)
That is not to say that the accessories are not nice; they are, but context is key. Will you add an excluder widget to your super before harvest, or will you shake or brush bees off and deal with them being slightly angry? I'm lazy and do the latter. Will you mark new queens or learn to spot them yourself without a marking? Again, I am lazy and do the latter.
It is very easy to simply buy a hive accessory kit online, get every bell and whistle, and move on. I did, and I don't regret it. But I also don't use half of the items it came with. If you want to get started while spending a bit less, the first three of the above items are key at the start, with the rest possibly becoming necessary later on!
Optional – Wax and a Paint Roller
One other item beekeepers typically recommend is adding a layer of melted beeswax onto new plastic foundations. While these often come “pre-waxed,” many beekeepers have noted that additional wax is necessary to help bees start drawing comb on new frames.
This is a slightly laborious and messy process as you need to melt beeswax and apply a thin coat onto each side of the foundations.
Many beekeepers will have a dedicated and small crockpot to melt wax and use a dedicated paint roller to apply wax onto frames quickly. I have also used a double boiler with the 2nd vessel being a disposable aluminum tray to melt wax with the entire setup being on top of plastic on our stainless steel chefs table for easy cleaning.
No matter what you do, a little prep goes a long way for cleanup as wax almost never comes off surfaces once it hardens. Dedicated equipment, extra plastic, or a garage/outdoor mess space is key here- never mix materials when beeswax is involved.
Wax can be purchased in one-pound, five-pound, and higher increments online. I generally find I go through 1-2 lbs of wax per new hive and like to have at least a 5 lb bag on hand.
Optional – Flyway Barrier and Leveling Material

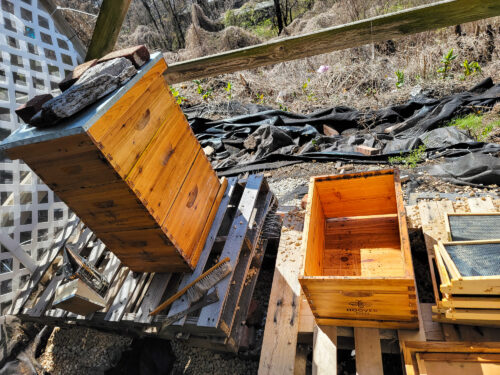
Depending on where you are setting up your apiary, you may need to buy equipment to level your hives, raise them off the ground, create a flyway barrier (to direct the flight path- especially if you have hives in a city with zoning requirements), and to protect from any predators (bears, skunks, etc.).
I use a combination of cinderblocks, bricks, and pallets to raise my hives off the ground and provide a level surface for the hives. Others use variants with wood beams in cinderblocks or even more crafty options.
As my main pests are small animals, I just put bird spike strips facing outward in front of my hive to limit any small animals from getting close. Those with larger, more agressive predators like bears may even need to get a full electric fence system as bears will knock over hives to get to the sweet, sweet honey without a care in the world.
Flyway barriers are any form of wall that circles beehives to help force the bees to fly in a particular direction. In our city, we cannot keep bees within about 10 feet of a property line, of which we have on both sides of our hive, so we had to construct a barrier to force our bees to fly out in the forward direction only.
The logic here is that bees generally fly forward and up, about one foot vertical per one foot horizontal, so with 10 feet of space from a property line, bees would be up to 10 feet in the air and over the heads of any neighbor. (Yes, we live on a hill. Yes, our closest neighbor is a deck 20 feet in the air. Yes, our bees fly down the hill. Yes, we still had to do this.)
Ultimately, I was cheap and did not build a full fence but rather used lattice garden fencing with a fine mesh netting tied on, using our deck beams as support (these do not stand upright on their own). This was enough to get our bees to fly out all the same.
Sugar and Pollen

Feeding bees sugar and pollen when a hive is new, during periods of dearth, and if they did not store enough honey for winter is key for survival.
While some long-term beekeepers may argue you can get by without any of this, we feel it is especially crucial when a hive is young- especially if you buy package bees over a nucleous colony (although we would feed regardless)!
A 1:1 simple syrup given to a hive with a feeder bucket (read more why we prefer feeder buckets here) helps give a new colony close resources when starting out independent of the outside environment.
For a standard pale, you'll likely go through 6-8 lbs of sugar to fill, so if you have several hives that can add up to many bags of sugar!
Likewise, a little extra pollen in the spring and fall can help your bees get protein stores for survival. These can be easily purchased from local apiaries when picking up a colony.
Note: Many beekeepers like to feed a 1:1 mixture in the spring, 2:1 mixture in the fall as it is more concentrated and wont need to concentrate as much, and solid sugar in winter as it will not freeze. Never feed your bees sugar during a nectar flow when a super is on as it could produce faux “funny” honey. For pollen, I always buy from a local apiary to ensure they are fresh!
Optional – Honey Extractor

Honey extractors are a piece of premium equipment used during harvest. They function more or less as a centrifuge where frames spin at high speed, forcing honey out of the frames and collected in a reservoir that can be opened to pour into a bucket or other vessel.
Extractors are a prized tool for apiaries particularly because they do not destroy drawn comb (that much, at least). You simply cut off the wax cap on the honey, spin the frames on both sides, and can place them back in a hive for the bees to continue adding more honey.
Without an extractor, you likely will have to go a destruction route which involves scraping all of the drawn comb off the frame, crush, mash, and strain, and put an almost clean frame back on your hives. This can delay your next harvest by weeks or even a month as the bees will need to redraw comb before being able to store more honey.
The downside to extractors is that they are expensive. They can come in 2, 3, 4+ frame configurations and be manual or automatic. The cheapest (and lowest quality) extractors often exceed $150, and some of the highest end, motorized options can easily be $1,000.
Does it make sense to buy a $300 extractor for two hives? Maybe, if you have the budget. Would it be better to make a friend beekeeper nearby and go in on one together, as the bulky equipment may only be used two or three times per year at best? Absolutely.
For my four hive apiary, I purchased a three frame, manual extractor as I felt like it was the best balance of size, cost, and number of passes needed for my 32 frames in my supers.
Thankfully, you will likely not be extracting honey in your first year, and you may also grow your apiary slowly over several years. As such, this purchase is not practical at the start but could be one to consider later on as needed.
Honey Storage Vessels

When you harvest honey, you'll likely need many vessels to store your honey (and wax!) in.
To give you an idea, one shallow frame of honey yields about 4 lbs, a medium 6 lbs, and a deep 8 lbs per frame. Multiply this by your hive size to estimate potential yields for any given harvest.
Honey often has a density of about 12 lbs/gallon (1.4 kg/liter) as well, so you can then begin to estimate what kind of storage is necessary.
Most small beekeepers, like myself, utilize five-gallon, food-grade buckets to store bulk honey after using the extractor and then divide the honey into smaller containers. (A double sieve is also recommended to capture any significant bits that may have been trapped in your honey, too- an occasional bee part or debris is not unheard of!)
I like a mix of 1-gallon glass jars for our bulk storage and then quart, pint, and half-pint Ball jars for use in our kitchen and to give to friends. You may also want to go the novelty route and pick up other vessels like the cute honey bear jars you see in stores.
That said, its worth noting that unless you sterilize and significantly filter your honey, raw honey will crystalize. As such, unless you know how your honey behaves after a few seasons, we recommend always storing in wide mouth jars without exception.
Frame Storage for the Off Season
You may think that once you have your beehives installed that your frames and boxes will remain in place for your bees, but this is not the case.
Supers and brood chambers are added and removed throughout the season and in some cases (like a hive failure), removed from your apiary completely until the hive recovers.
The issue here is that any formerly used frame or hive box can become a breeding ground for pests. Mice, wax moths, mites, and others can get into your hives and seriously damage your foundations and equipment.
Brood frames can attract wax moths and generally need to be frozen for at least three days to kill any eggs, for example. After, a protective storage bin like a plastic container or thick zipper bag can provide a layer of protection, too. (Thick being the operative word here as moths and others can chew through thinner material- this happened to us storing in just a trash bag!)
For long-term storage, we have a lot of our equipment stored in a large outdoor Rubbermaid storage unit and frames in smaller snap-lock storage bins, too. The space requirements for storage adds up!
Mite Treatments
Finally, you will also likely want to buy treatment for mites as these can build up in your hives and cause a collapse with enough time. Bee numbers may rise and fall seasonally, but mites continue to reproduce if there is brood.
Mite treatment can take many forms, be it thymol oil, formic acid, or oxalic acid treatments either via vaporizer or a drip. Whatever method you prefer is up to you, but you will likely be buying mite treatments regularly each year.
It is worth noting that many mite treatments have an associated expiration date. Strips made of formic acid, for example, are designed to be a slow-release treatment in a hive. When expired, the acid may release too rapidly and cause massive death. As such, you may only want to buy these as needed. You may not need them immediately, but you will need them eventually- so keep this one on your radar.
Bee Keeping is an Expensive Hobby, But Worth It

Ultimately, beekeeping is not a cheap hobby, but it is incredibly rewarding, fun, and tasty.
We have a complete analysis of how long it takes beekeeping to pay itself off, but if you have clicked through to any of the products featured in this guide you can see how it becomes easy to spend upwards of $500-$1,000 per hive to get started.
While you do not need all of the items featured in this list, and some perhaps later on as opposed to the start, this should be a great set of products to get started on your beekeeping journey!
Do you have any beekeeping equipment not featured above that you think is necessary? Comment below to share!
Start an Apiary Today

Looking to get into beekeeping? Pick-up preassembled waxed Hoover Hives from Galena Farms. Use discount code HIPSTERHOMESTEADERS to take 5% off your order!