
Disclaimers: Our site uses demographic data, email opt-ins, display advertising, and affiliate links. Please check out our Terms and Conditions for more information.
Whenever we want to buy a new appliance for our kitchen, we often have to take a good hard look at whether or not the benefit is worth the tradeoff of using the limited storage space we have.
So when we were considering buying a dehydrator, we wanted to make sure we could get good use out of it (note: some ovens have a dehydrator function which would be great, but ours does not). We thoroughly researched all the things you can do with a dehydrator and were convinced- and luckily it has lived up to all of our hopes and dreams.
So in this one, we thought we'd share some of our favorite uses for this magical appliance!
Dehydrate Fruits and Vegetables

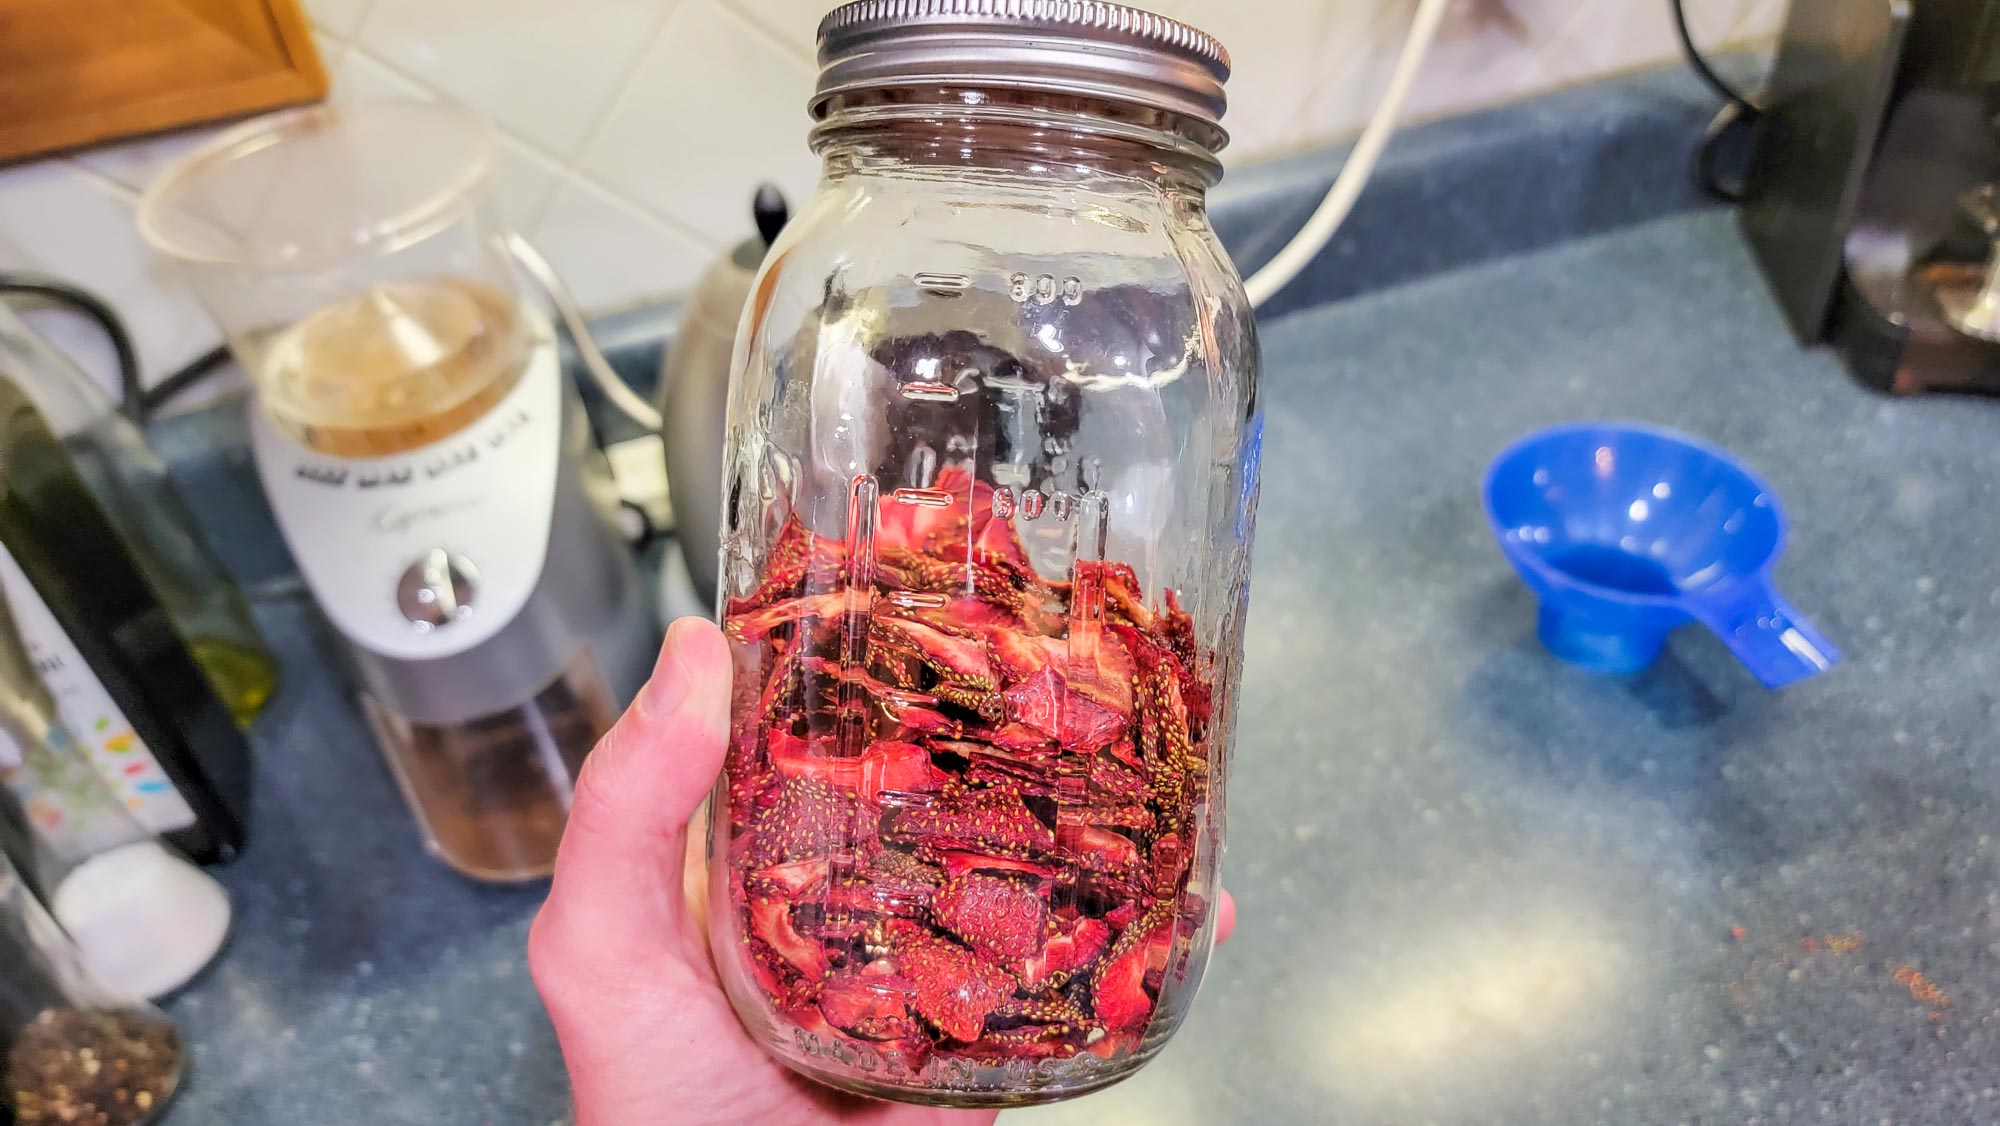
When it comes to all things dehydrated food, odds are good your mind goes to fruits and vegetables as being the ones you are likely to consume the most (it is ours). So, naturally, this was the primary purpose for which we bought our dehydrator. If you garden a lot or have access to a surplus of fruits and veggies, dehydrating is one of the most convenient ways to process them as the end product is shelf stable and often takes up less space than pressure or water bath canned products.
We also love the simplicity of the dehydrating process- simply wash, evenly slice/dice/chop the fruit or vegetable, spread out on the dehydrator trays, and dehydrate at around 125-135 °F.
The dehydration time required greatly depends on the type of fruit or vegetable you are working with. The time can be as little as four hours for strawberries to as long as 24-36 hours for stone fruit or tomatoes due to their increased moisture content. The key is to check the product frequently and see if it is pliable and flexible, but not sticky nor too dried out (pending end goal, of course!).
Make Fruit Leather

Have an even bigger surplus of fruit and running out of capacity to eat dehydrated slices? Fruit leather is surprisingly simple to make, and in our opinion tastes much better than what you can buy in a store. Plus, you can have fun creating unique flavor combinations!
To make fruit leather, all you have to do is wash and prep the fruit (remove pits, cores, etc.), then process it to a smooth texture using a food processor, blender, immersion blender, or food mill. Most fruits won't need any extra seasoning or help to taste great, but if you like you can add a little sugar and/or lemon juice (one or two tablespoons of each for eight cups or so of fruit). We made a fruit leather once with a splash of cherry cider that added a nice little pop of flavor!
Spread out the puree on a fruit leather tray and dehydrate at 125-135 °F for 4-8 hours until pliable but not soft or sticky. Remove from trays, cut into pieces, and roll up with clingwrap.
Make Granola
It shouldn't be a shock when we state that store-bought granola is expensive, and most conventional brands also contain nuts which isn't great those with allergies (read: me). We love making granola in our dehydrator as we can customize the ingredients and flavors and save money in the process, too!
Our favorite combination is oats, dried fruit, pepitas, dried shredded coconut, vanilla, cinnamon, maple syrup, and our homemade apple butter. Toss everything together, spread out on fruit leather trays or parchment paper, and dry at 125-135 °F for about 6-8 hours, breaking up the granola into chunks and tossing every couple of hours.
Use as an Incubator for Fermentation

Another more creative use for your dehydrator is as an incubation chamber to create different fermented products like yogurt and amazake. For yogurt, heat milk on the stove until it reaches 185 °F, cool it down to 115 °F, then whisk in 4 tablespoons of yogurt for every half gallon of milk. Transfer the mixture to glass jars, cover, and incubate at 110 °F for about 8-10 hours.
Amazake is a Japanese rice beverage that's made using a fungus called koji that's grown on rice. You can either make your own koji rice using starter spores, or purchase pre-made koji rice at an Asian grocery store or online. Basically, you'll add one part cooked regular rice to one part koji rice, place the mixture into glass jars, and ferment at 135 °F for about 12 hours. The koji breaks down the rice and it becomes a delicious sweet porridge that you can enjoy thick as is or dilute with water or milk. Grated ginger on top is both traditional and amazing.
Use as a Bread Proofer

Finally, if you're looking for a warm place to let your bread dough rise, consider using your dehydrator as a makeshift proofing basket (if you don't want to build a proofing basket like we did).
There are a few caveats to consider with this one, though.
First, the dehydrator's fan can dry out the dough if it is left uncovered, so be sure to cover the dough container to lock in the moisture.
Second, the ideal temperature range for proofing most bread doughs is 70-85 °F (depending on what type of bread you're making), and that yeast dies around 115 °F or above. Most dehydrators don't go down to 70-85 °F (the lowest temperature setting on ours is 95 °F), so you'll want to be careful that the dough doesn't get too hot. You should experiment with propping the door open to achieve the right temperature. It's a good idea to have an instant-read thermometer to monitor the dough temperature throughout the rise.
Overall, our dehydrator has become one of our most beloved kitchen appliances and we've found a number of great uses for this otherwise bulky product well beyond drying out fruits and vegetables!
Do you have a favorite use for your dehydrator? Comment below to share!
Curious on if a dehydrator is worth the cost? We did a payoff analysis to see just how much you have to use a dehydrator for it to pay itself off here!