Disclaimers: Our site uses demographic data, email opt-ins, display advertising, and affiliate links. Please check out our Terms and Conditions for more information.
Kombucha is a delicious beverage that's made with sweetened tea fermented with a mixed culture of bacteria and yeast. Although it's widely available in grocery stores these days, making kombucha yourself at home is a really fun and easy fermentation project that can save you money and allow you to customize the flavor and ingredients.
Kombucha was one of the first ferments that I dove into – I like to think of it as a gateway ferment. Requiring nothing more than water, sugar, tea, and a starter culture, it also has a pretty short fermentation time so you can enjoy the fruits of your labor relatively quickly.
We're going to walk you through everything you need to make kombucha and outline the steps to brew this zippy fermented drink.
Tools You'll Need for Your Kombucha Brew Kit
Starter culture (SCOBY): The trickiest part of getting in to kombucha making is obtaining the starter culture, or SCOBY. The easiest option is to purchase a SCOBY from an online store like Cultures for Health but some vendors even sell them on Amazon. Other options are to seek out a SCOBY from a neighbor or friend in your area (try checking in online forums and groups for those into fermentation), from a local kombucha shop (this is how we got our original SCOBY), or growing a SCOBY using store-bought kombucha (trickier and requires more time and patience).
Kombucha: You'll need about 1 c. of already-made kombucha to ensure the appropriate acidity at the start of the fermentation. When obtaining your SCOBY, ask the vendor/friend if they can give you 1 c. or more of already-fermented kombucha that you can use for this purpose. Alternatively, you can use plain store-bought kombucha. For subsequent batches, all you need to do is save 1 c. of kombucha and add it to the next batch.
Tea: Plain black tea does the job and is actually the best for maintaining a healthy SCOBY. Don't use teas with added flavors or oils (like Earl Grey) as they can inhibit fermentation. Once you have more SCOBY's than you know what to do with, you can experiment with other types of tea like green, oolong, and white. We prefer to use looseleaf black tea instead of tea bags, although we admit our first few batches used Lipton tea bags and they worked just fine. These days we are digging Rishi organic black teas for our base kombucha.
Sugar: Plain white sugar works just fine, and from what we've read is actually the best option for a healthy SCOBY. We've read you should avoid brown sugars, honey, maple syrup, etc. although we haven't personally tried any of these to verify if they cause issues.
Water: Regular old tap water will work, but we use filtered water from our fridge. If you can drink it, it's fine for kombucha.
Strainer: I use a fine mesh strainer for straining out the tea leaves from the brewed tea concentrate. A larger strainer or colander is also useful for retrieving the SCOBY after your batch is complete.
Funnel: Useful for transferring liquids into your brewing vessel.
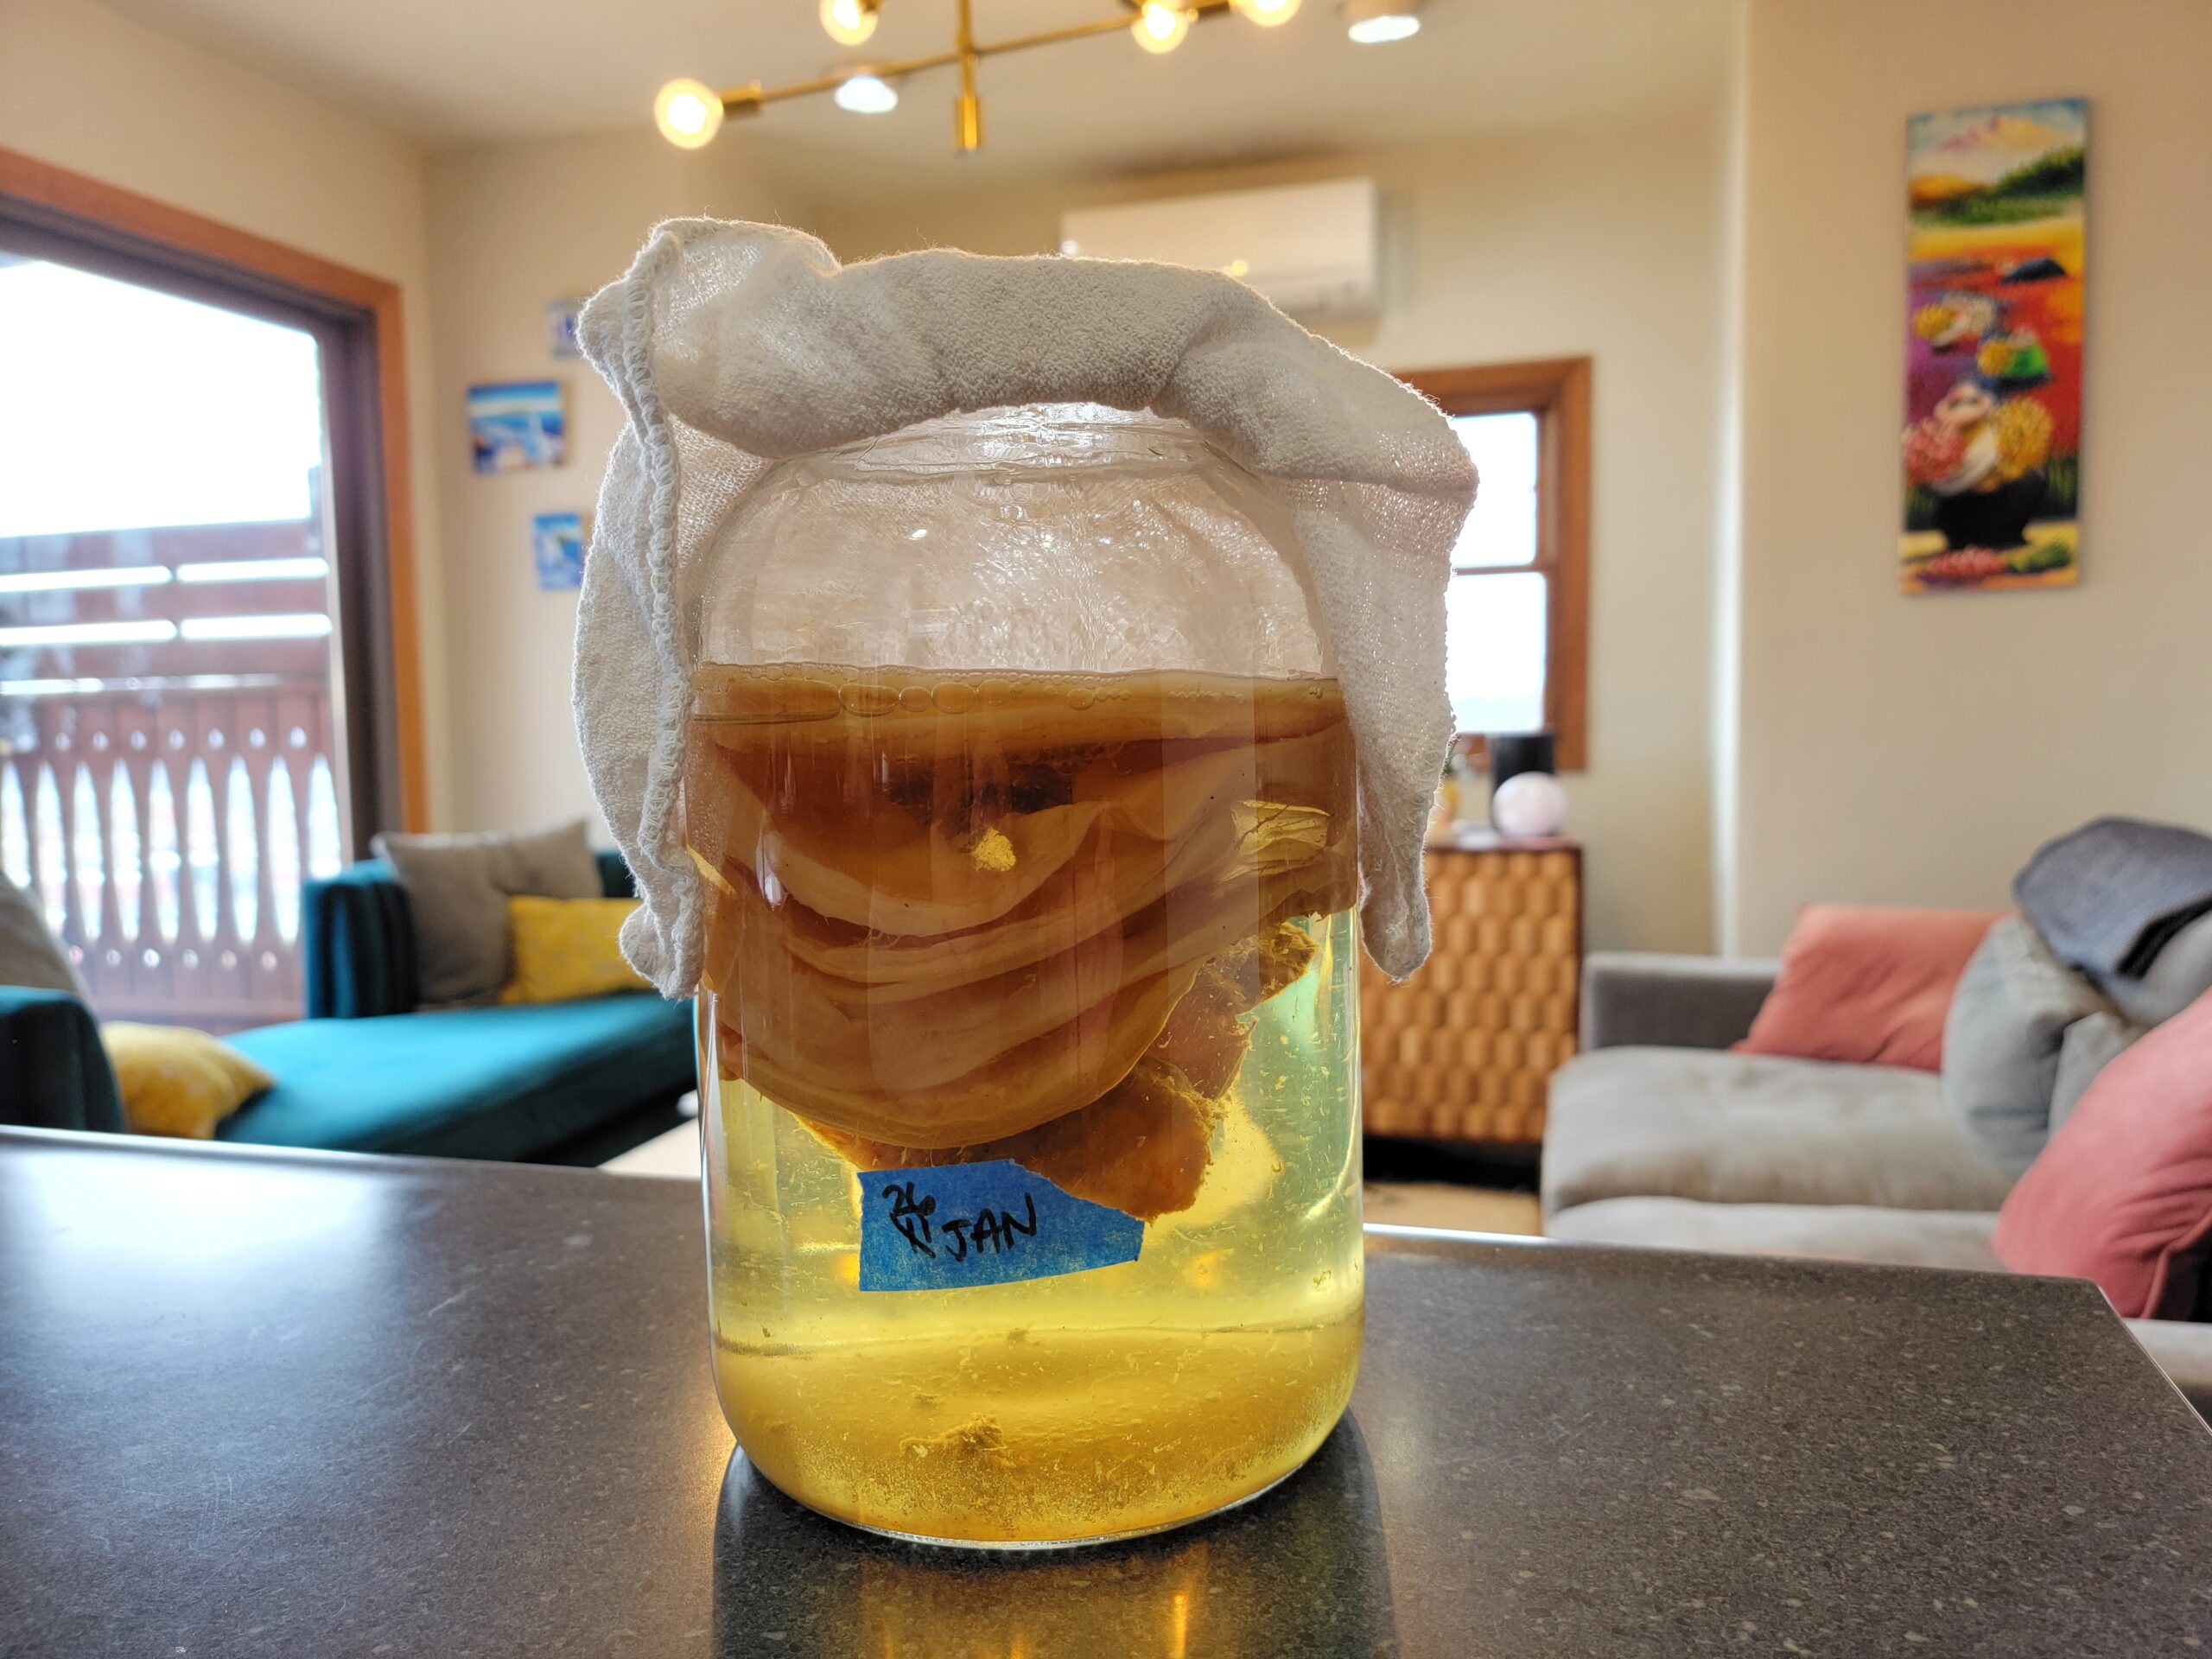
Large vessel for brewing: We like fermenting in glass containers so we ferment in something like this with a large surface area for the SCOBY to spread out.
Cloth cover: We've had bugs get in our kombucha before (especially in the summer months) so it's important to cover your brew vessel with a breathable cloth cover and tie it down. (Note that some kits made especially for kombucha include cloth covers with the vessel- highly recommended!)
Now that you've got all of your ingredients and equipment, let's take a look at our kombucha recipe!
Easy Kombucha Recipe at Home
To brew at home, you'll likely want to start with the following kombucha ratios:
- 12 c. water
- 3/4 c. sugar
- 4-6 T. looseleaf black tea
- 1 c. kombucha
- SCOBY
The steps to brew your own kombucha are quite easy from there:
Heat 1 c. water to the temperature recommended on your tea package. Add 3/4 c. sugar to the 1 c. hot water and stir to dissolve. Add your tea and give it a brief stir, then brew for the time recommended on your tea package. Strain the tea leaves out of your sweetened tea concentrate after brewing.
To your clean, empty kombucha brewing vessel add the brewed sweetened tea concentrate plus 11 c. cold water. Measure the final temperature of the diluted tea – it should be about 85F or cooler before proceeding.
Add the SCOBY and 1 c. prepared kombucha to the brew vessel.
Cover your brew vessel with a breathable cloth and tie it in place. Keep the vessel in a room temperature spot that's not in direct sunlight.
Start smelling and tasting your kombucha after about 10 days. If it is to your liking then go ahead and strain out the SCOBY, save 1 c. kombucha for your next batch, and start your next batch. The kombucha will get tangier and more acidic as it ferments longer so be patient. I typically ferment my kombucha for about 2 weeks or longer as I love it nice and acidic!
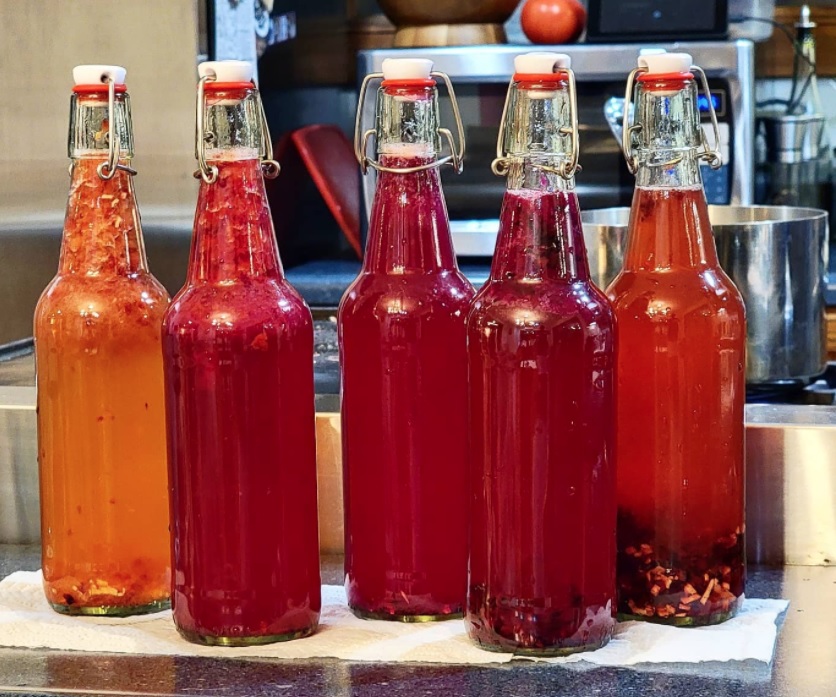
Keep the finished kombucha refrigerated in a pitcher, bottles, or jars. We like using flip-top grolsch bottles for this purpose.
You can also do a secondary fermentation at this point in order to carbonate the kombucha and add additional flavors. In order to do this, to a 12-oz grolsch-style bottle, add 1-2 tsp. sugar and 2-3 T. pureed or mashed fruit of your choice. You can also add herbs and other flavorings too. Top the bottle up with your brewed kombucha, leaving a half inch of head space, and seal the bottle. Leave at room temperature for 2-3 days to carbonate, but be sure to open the lids and “burp” the bottles once a day to release excess pressure (no one likes exploding bottles!). After 2-3 days move the bottles to the fridge.
We hope we've shown you how easy and fun making kombucha can be! It's a great way to dive into fermentation and create a personalized product that's all your own.
Do you brew kombucha at home? What steps do you differently or what flavors do you like to make? Comment below to share!
Pick Up Fermentation Gear Today
Improve your fermentation game with some great new products from Cultures for Health- a great spot for buying cultures, spores, and more!

