Disclaimers: Our site uses demographic data, email opt-ins, display advertising, and affiliate links. Please check out our Terms and Conditions for more information.
If you garden at all, chances are you've been overwhelmed at one time or another with the volume of produce your garden has produced. Or perhaps you participate in a CSA and just can't figure out what to do with those five-pound zucchinis they keep giving you. Or maybe you've just been a little too ambitious with your farmer's market purchases.
We've all been there. However you got there, you've ended up with too many fruits, veggies, or herbs, and there's no way you'll be able to cook with them all before they go bad.
We've been in this position numerous times, and while it used to stress us out trying to figure out how to eat kale for breakfast, lunch, and dinner, we've come to realize that there are so many ways to preserve summer's bounty for future enjoyment.
In this one, we dive into an overview of five of our favorite ways to preserve fruits and vegetables- what they are, what equipment you'll need to get started, and some basic ideas to spark your creativity.
Freezing Fruits and Vegetables

What it is and equipment required: One of the simplest techniques of all, freezing raw or cooked produce can work well for so many different fruits and veggies and doesn't really require any dedicated equipment- you simply need a freezer, cookie sheets, parchment paper, and freezer bags.
What type of produce works best for freezing: The sky's the limit- for fruit, we commonly freeze all kinds of berries and stone fruits; for vegetables, greens, brassicas, peppers, squashes, and root vegetables are just some of our favorites.
Ideas for getting started: In general we like to prep the produce and then spread it out on cookie sheets to freeze before placing in an airtight container. Freezing on trays first prevents the produce from freezing into one giant lump. For berries, wash and dry, spread out on cookie sheets until frozen, then transfer to a zip-top bag or other airtight containers. For things like stone fruit, wash, pit, and slice or cut into chunks before spreading out on cookie sheets to freeze. For veggies, peppers freeze well when raw; just wash and slice or dice before freezing. Other veggies are better when cooked first, like greens or winter squashes, for example. Hardy greens like chard and kale can be blanched or steamed and water squeezed out before freezing; for winter squashes we like to roast then mash them into a puree before freezing. Squash puree can go directly into a zip-top bag and then be placed on a tray so it freezes flat. Zucchini is another great candidate for freezing; we like to shred it using the grater attachment for our food processor and then freeze it in bags.
Ideas for using frozen fruit and veggies: Frozen fruit is the perfect starting point for smoothies, and it can be thrown into baked goods, oatmeal, pancakes, and more. Frozen squash purees can be made into soups; frozen grated zucchini is great for zucchini bread, savory pancakes, and stir-fries to name a few.
Dehydrating for Long-Term Storage

What it is and equipment required: Dehydrating food is the simple concept of removing water from a product to reduce the water activity to a point at which microorganisms can't grow. This creates a product that can be stable at room temperature for weeks or years provided that it is stored away from moisture (length of stability depends on the type of food). You may not need any special equipment to dehydrate if your oven goes to a low enough temperature (ideally 200 °F or lower) or has a dehydrate setting. If you're not that lucky, or if you don't want to tie up your oven for days at a time, then you'll need to invest in a dehydrator. Cylindrical models, where the air blows in one direction from the bottom up, tend to be plastic and more affordable, with the drawback that they generally have a smaller capacity and you usually can't set them to a specific temperature. If you spend a bit more you can get a sturdier stainless steel model (like our Magic Mill that we absolutely love) that has more capacity and allows you to set specific temperatures and times.
What type of produce works best for dehydrating: The sky is nearly the limit here as well- all kinds of fruits, vegetables, and herbs can be dehydrated. We have experimented with berries, citrus, stone fruit, and greens, but you can dehydrate nearly anything. Just keep in mind that fruits and veggies with higher water content (think watermelon, tomatoes, cucumbers, etc.) will take longer to dehydrate.
Ideas for getting started: Larger fruits and veggies will dehydrate best if you slice them to an even thickness first. Wash, slice/dice, spread out onto trays, and pop into your oven or dehydrator. Dehydration time will depend on the type of food and temperature; in our Magic Mill at around 140 °F, most fruits and veggies dehydrate in about 6-10 hours. If you're dehydrating watery products like tomatoes you may need to flip them halfway through so they dry more evenly. Store in an airtight container or vacuum-sealed bag after dehydrating to minimize contact with moisture in the air. For something a little fancier, try kale chips (massage chopped up kale with oil and your favorite salt or seasoning blend prior to dehydrating) or fruit leathers (add a little sugar and just enough liquid (like citrus or fruit juice) so that the fruit can be processed in a blender or food processor, then spread onto a fruit leather tray to dehydrate).
Ideas for using dehydrated fruits and veggies: Dehydrated fruits are great on cereal or oatmeal, or they can be rehydrated with water or fruit juice and blended to make a sauce. Dehydrated veggies can be used in soups, stews, and stir-fries; or try grinding the dehydrated vegetables into powders which can then be used in any cooked dish or even in smoothies.
Fermenting Fruits and Vegetables

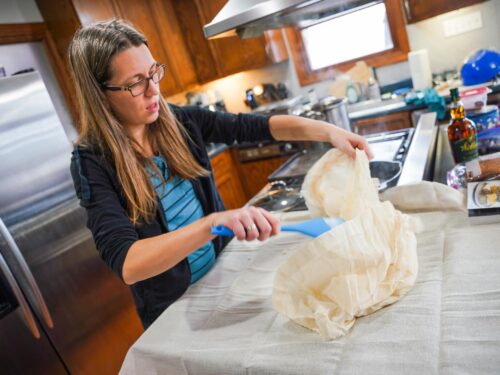
What it is and equipment required: Typically when we say fermentation in relation to preserving food, we mean lacto-fermentation. In this process, foods are placed in a high-salt environment that prevents the growth of dangerous bacteria, while allowing beneficial lactobacillus bacteria to convert sugars in fruits/veggies to lactic acid, further preserving the produce. Once you've fermented your product to your liking, you can move it to the fridge and it will keep for months or years. You can lacto-ferment without any special equipment; all you really need is a non-reactive container to hold your ferment. We love fermenting in wide-mouth glass mason jars. Depending on what you're fermenting you may need to keep the product from floating to the surface of the brine, which you can do with any heavy object, but we typically use a smaller mason jar filled with water. Finally, you'll probably want a breathable cloth cover to keep bugs and such out of your ferment. Of course, fancier equipment does exist- everything from ceramic pickle crocks to glass fermentation weights to fermentation airlocks (we even have a kioke). But don't let those hold you back; you can literally use any non-reactive vessel as a fermentation vessel.
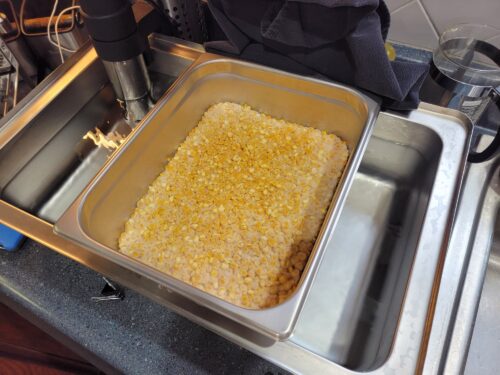
What type of produce works best for lacto-fermentation: We haven't done much with lacto-fermented fruit, but it is definitely possible (check out the Noma Guide to Fermentation for a ton of ideas). Nearly any veggie can be lacto-fermented, but some things like dark greens can get pretty funky. There's basically two techniques for adding salt to your ferment- dry brining or wet brining. In dry brining, you sprinkle salt on your sliced or shredded veggies and massage it into them. The veggies then release water and create their own brine which they are submerged in during fermentation. In wet brining, you create a 2-3% salt brine (i.e. 2-3 g salt for every 100 g of water) then pour it over the vegetables to ferment. Dry brining works better for veggies that have a lot of water and aren't as sturdy, like tomatoes and cabbage. Wet brining is more suitable for sturdier, crunchier veggies like winter squashes or for things like cucumber pickles where you want them to stay crisp.
Ideas for getting started: One of the simplest dry-brined ferments is sauerkraut- wash and shred your cabbage, put it in a bowl, sprinkle with salt, and massage it until it releases a steady stream of liquid when you squeeze a handful of it. Pack the cabbage tightly into a clean vessel, pour the released brine over the cabbage to cover, weigh the cabbage down so it's submerged in the brine, and cover. Ferment at room temperature for 2-4 weeks (tasting along the way until it's as tart as you like it), then place in the fridge. If you want to get fancy you can add spices and seasonings to the cabbage- try garlic, fresh dill, or caraway seeds, for example. For wet brining, cucumber pickles are a classic place to start. You can add herbs and spices to your jar before packing the sliced cucumbers in (mustard seeds, fresh dill, cloves, star anise, fresh garlic, bay leaves, hot peppers, etc.) and covering with your 2-3% brine. Place a weight on top and ferment at room temperature for 2-3 weeks or more. For other ideas and ways to get started fermenting, check out our favorite fermentation book, The Art of Fermentation by Sandor Katz.
How to use your lacto-ferments: Just eat them straight up! Fermented veggies make great side dishes for grilled or smoked meats as their tanginess cuts the richness of the meat. They're also great as part of a cheese and charcuterie board. We also like to make fermented sauces (like hot sauces and herb sauces) and we use those all the time on top of eggs, in salad dressings, and on sandwiches.
Water Bath Canning

What it is and equipment required: High acid foods (with pH below 4.6) are packed into mason jars, placed into a boiling water bath, and processed for a certain period of time. The high temperature of the water bath and the vacuum that's achieved in the jars help prevent the growth of microorganisms and reactions with oxygen. It's extremely important to follow a tested recipe when water bath canning, as the final pH of the product is vital to ensuring food safety. Canning requires some equipment to get started, including a large pot to use as a water bath and glass jars with sealing lids made for canning. There are a few other tools that can make canning significantly easier, like a jar lifter, wide-mouth funnel, and magnetic lid lifter and these can often be purchased in a set.
What type of produce works best for water bath canning: Fruits and tomatoes are generally the only acceptable types of produce for water bath canning as they are high acid. All manner of jams, jellies, tomato sauces, and fruit butters can be water bath canned. The only way vegetables can be water bath canned is if their pH is lowered with vinegar or lemon juice, for example- think things like vinegar pickles, chutneys, salsas, and relishes. Remember, only use tested canning recipes from a reputable source.
Ideas for getting started: Once you've gathered all the necessary equipment, we'd recommend picking up a few books to get started with water bath canning since you need to use tested recipes. Some of our favorites are the Ball Complete Book of Home Preserving (a true tome with recipes for everything you could ever want to can), Ball's The All New Ball Book Of Canning And Preserving (more modern flavors and recipes; includes a section on fermentation as well), and Canning & Preserving with Ashley English (for more gourmet/artisanal recipes with unique ingredients). Strawberry jam is a classic place to start- or jam with whatever fruit is in season where you live.
How to use your canned goods: Jams and fruit butters are perfect on toast or swirled into yogurt or oatmeal. You can also make dressings and marinades with them. We somehow always end up with way more apple butter than we can slather on toast, so we turn to baking with it. You know that trick for substituting applesauce for oil? It works with apple butter, too. We also can tomato sauce every year which is one of the most useful staples to have in the kitchen for pizzas, pastas, casseroles, and more.
Pressure Canning

What it is and equipment required: As mentioned above, vegetables generally can't be processed in a water bath canner. However, they can be processed in a pressure canner because at 15 PSI, the temperature gets up to 240 °F instead of the 212 °F of a water bath canner. Pressure canning requires the biggest investment out of all of the preserving techniques, as you'll need to pick up a dedicated pressure canner (be forewarned- they take up a fair bit of space). Besides this, the equipment is the same as water bath canning (jar lifter, wide-mouth funnel, and magnetic lid lifter).
What type of produce works best for pressure canning: Vegetables are great for this technique and pretty much anything goes, from asparagus to carrots to potatoes. Greens aren't the best candidate for pressure canning (freezing is better), though, and if you're going to pressure can mushrooms be sure that they're farmed mushrooms and not wild mushrooms. Also, when pressure canning anything be sure you're using a trusted source for recipes and processing times for the same reasons discussed in water bath canning.
Ideas for getting started: Beets, carrots, and winter squash are great places to start. Personally, we use pressure canning almost exclusively for vegetable and meat stocks. Sure, you can freeze stock but we love saving the freezer space and not having to defrost it when we want to use it. We also typically pressure can tomato sauce. Although tomato sauce can be canned in a water bath, our pressure canner is much larger than our water bath canner, so we can do much larger batches.
How to use your pressure-canned goods: From simple side dishes to casseroles and pot pies, pressure-canned veggies can be used in the same way you would use any store-bought canned veggies. As for stocks, they're one of the foundations of great cooking that we couldn't live without. Some of our favorite uses are as the base for pan sauces, soups and stews, pasta dishes, and risottos.
Do you have a favorite way to preserve fruits and vegetables at home? Or perhaps a recipe you simply adore? Comment below to share!
Pick Up Fermentation Gear Today

Improve your fermentation game with some great new products from Cultures for Health- a great spot for buying cultures, spores, and more!